Baremetal Kubernetes Installation with Kubespray
Ever wondered how you can install Kubernetes on your old hardware lying around? Majority of the public cloud providers offer a managed Kubernetes service. Managing Kubernetes on bare metal or virtual machines can be challenging and error prone. To ease the management, Kubespray can help. Kubespray is a set of Ansible playbooks which can easily handle the lifecycle management of Kubernetes on self installed environments.
Topology
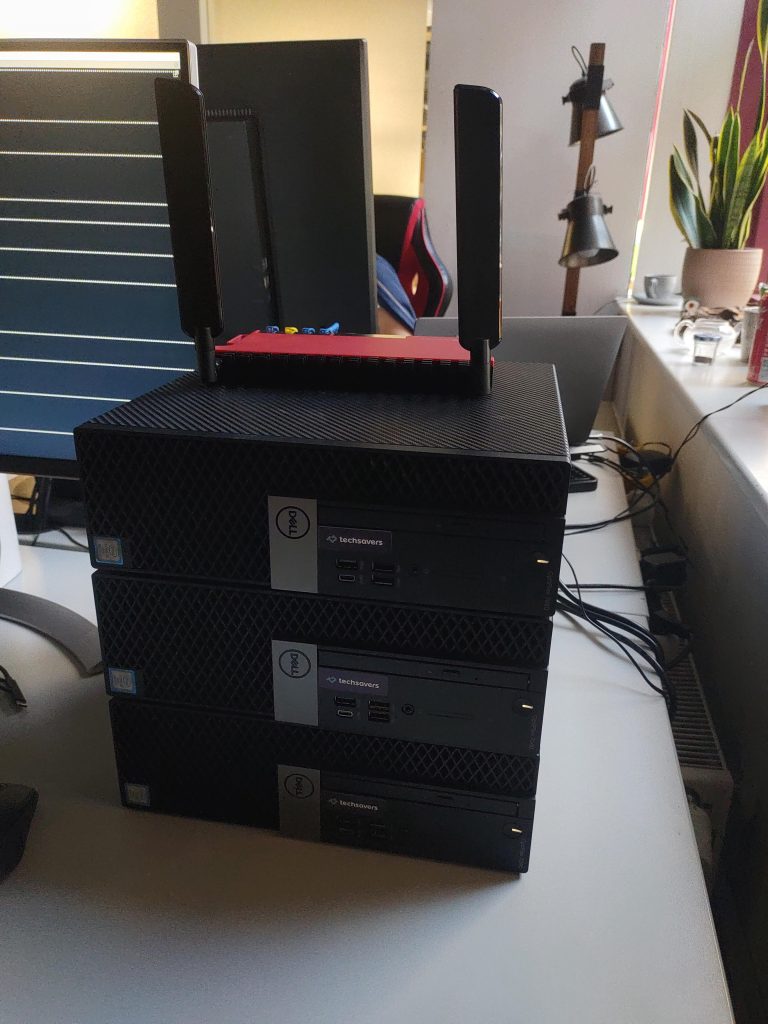
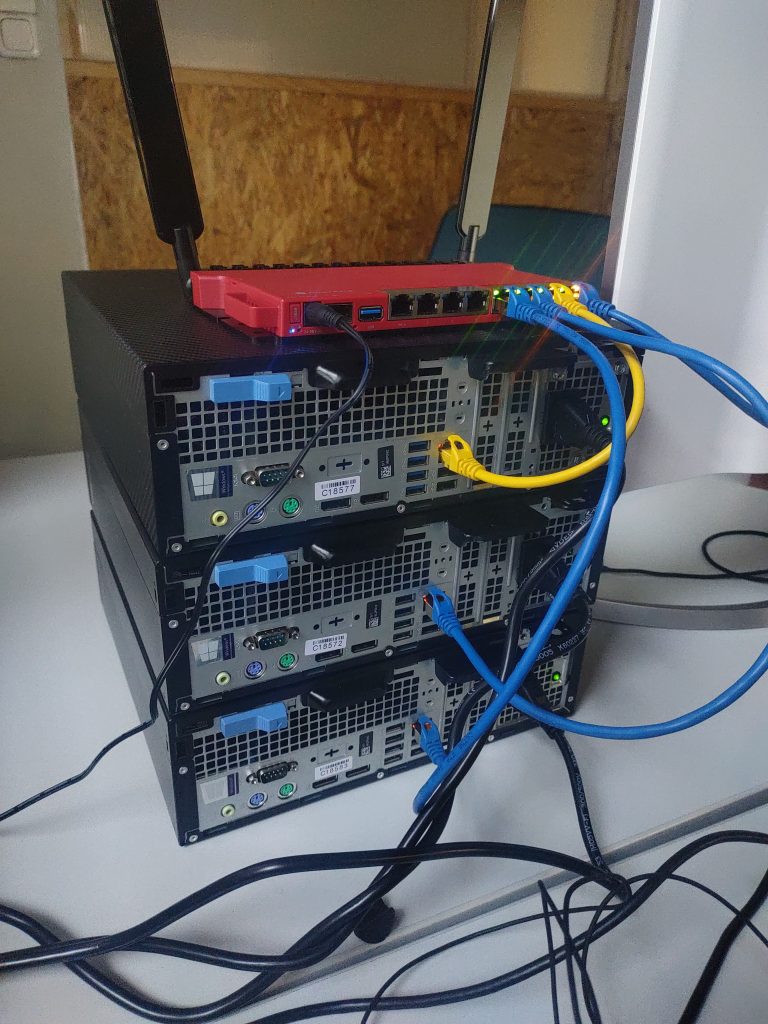
For this demonstration I’ve picked up 3 refurbished Optiplex 7060s from refurbished.sk and connected them into a simple L2 topology over a new Mikrotik L009 Series.
First, we need to set up these machines with an operating system and a user with a public SSH for remote access. As for operating system I’ve chosen Rocky Linux 9.3.
Kubernetes Installation
As a pre-requisite you will need python3 running on your host (provisioner) and ssh access towards your nodes. Note, that this tutorial is prepared for a Linux / Mac environment.
Clone the Kubespray repository and check out the latest tag. At the time of writing this tutorial the latest tag is v2.23.0, which installs Kubernetes 1.27.
> git clone https://github.com/kubernetes-sigs/kubespray.git
> git checkout v2.23.0
Initialise a virtual env in this repo, activate and install the requirements.
> python3 -m venv venv
> source venv/bin/activate
> pip3 install -r ./requirements.txt
You will need to generate an inventory file for the installation. Get the copy the sample inventory.
> cd inventory
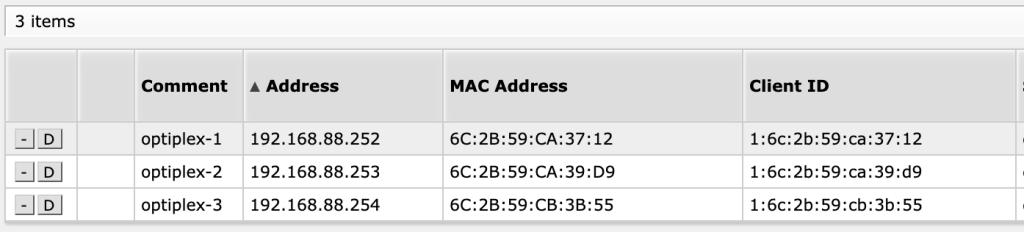
> cp -r sample lab-spaceupGet the IP addresses of your nodes via ip addr or get the information from your DHCP server. Reserve allocations for your nodes with DHCP to make sure, addresses won’t change on renew.
Kubespray comes with a helper script to generate an inventory file. The script is configurable with additional Environment variables.
> export CONFIG_FILE=inventory/lab-spaceup/hosts.yaml
> export HOST_PREFIX=optiplex-
> export KUBE_MASTERS=3
Run the inventory builder script.
> declare -a IPS=(192.168.88.252 192.168.88.253 192.168.88.254)
> python3 ./contrib/inventory_builder/inventory.py ${IPS[@]}
DEBUG: Adding group all
DEBUG: Adding group kube_control_plane
DEBUG: Adding group kube_node
DEBUG: Adding group etcd
DEBUG: Adding group k8s_cluster
DEBUG: Adding group calico_rr
DEBUG: adding host optiplex-1 to group all
DEBUG: adding host optiplex-2 to group all
DEBUG: adding host optiplex-3 to group all
DEBUG: adding host optiplex-1 to group etcd
DEBUG: adding host optiplex-2 to group etcd
DEBUG: adding host optiplex-3 to group etcd
DEBUG: adding host optiplex-1 to group kube_control_plane
DEBUG: adding host optiplex-2 to group kube_control_plane
DEBUG: adding host optiplex-3 to group kube_control_plane
DEBUG: adding host optiplex-1 to group kube_node
DEBUG: adding host optiplex-2 to group kube_node
DEBUG: adding host optiplex-3 to group kube_node
This setup creates an inventory for a 3 node cluster, where each node is a control node at a same time.
Some additional details should be set up in the group variables.
# in k8s_cluster/k8s-cluster.yml
# Make sure that there are system reserved resources for the OS
system_reserved: true
system_memory_reserved: 512Mi
system_cpu_reserved: 500m
system_ephemeral_storage_reserved: 2Gi
system_master_memory_reserved: 256Mi
system_master_cpu_reserved: 250m
system_master_ephemeral_storage_reserved: 2Gi

# set the domain name for your cluster (optional)
cluster_name: kube.spaceup.tbotech.sk

# set kube proxy strict arp (required for metalLB - covered later)
kube_proxy_strict_arp: true

# in k8s_cluster/k8s-net-calico.yml
# Make sure we are using VXLAN overlay networking
calico_network_backend: vxlan
calico_ipip_mode: 'Never'
calico_vxlan_mode: 'Always'

# in k8s_cluster/addons.yml
# enable Helm as we will be using it in the future
helm_enabled: true
For additional configuration options, please refer to the Kubespray documentation.
Run the Ansible playbook to provision your cluster.
> ansible-playbook -i ./inventory/lab-spaceup/hosts.yaml ./cluster.yml --become --become-user root -utboIt takes about 10-15 minutes to run. On successful run you should get a running Kubernetes cluster. The admin kubeconfig will be deployed in /etc/kubernetes/admin.conf. If you ssh to any of the nodes and switch to root you will have this config configured as default.
[root@optiplex-1 ~]# /usr/local/bin/kubectl get nodes
NAME         STATUS   ROLES           AGE    VERSION
optiplex-1   Ready    control-plane   126m   v1.27.5
optiplex-2   Ready    control-plane   126m   v1.27.5
optiplex-3   Ready    control-plane   126m   v1.27.5
Networking configuration
This configuration comes with a very basic setup and does not really gets the Cluster to a usable production deployment. Two main components missing, which would enable external access to our cluster are a Load Balancer controller and an Ingress controller.
MetalLB Installation
MetalLB is a Load Balancer controller designed for bare metal environments, which can expose services by assigning an IP address from a specified pool and responding to ARP requests. First you will need to install MetalLB. As for installation we have chosen Bitnami’s MetalLB helm chart.
> kubectl create ns metallb
namespace/metallb created
> helm repo add bitnami https://charts.bitnami.com/bitnami
"bitnami" has been added to your repositories
> helm install -n metallb metallb bitnami/metallb
After installation we have to specify an IP Address Pool from where MetalLB can allocate IP addresses to LoadBalancers. Choose an available IP pool in your network.
> cat metallb-pool.yaml
apiVersion: metallb.io/v1beta1
kind: IPAddressPool
metadata:
  # A name for the address pool. Services can request allocation
  # from a specific address pool using this name.
  name: kube-spaceup-pool
  namespace: metallb
spec:
  # A list of IP address ranges over which MetalLB has
  # authority. You can list multiple ranges in a single pool, they
  # will all share the same settings. Each range can be either a
  # CIDR prefix, or an explicit start-end range of IPs.
  addresses:
  - 192.168.88.20-192.168.88.39
> kubectl apply -f ./metallb-pool.yaml
Add a L2 advertisement configuration for MetalLB. This will create an ARP advertiser for the specified pool.
> cat metallb-l2advertisement.yaml
apiVersion: metallb.io/v1beta1
kind: L2Advertisement
metadata:
  name: kube-spaceup-advertisement
spec:
  ipAddressPools:
  - kube-spaceup-pool
> kubectl apply -f metallb-l2advertisement.yaml
With all these resources in place, now we can deploy an ingress controller, using which we can easily expose HTTP(s) services.
Nginx Ingress Installation
We are installing the NGINX Ingress with Helm too.
> kubectl create ns ingress-nginx
namespace/ingress-nginx created
> helm repo add ingress-nginx https://kubernetes.github.io/ingress-nginx
"ingress-nginx" has been added to your repositories
> helm ingress-nginx -n metallb ingress-nginx ingress-nginx/ingress-nginx
Upon successful installation we should have an Ingress Controller deployed and it should be exposed as a LoadBalancer.
> kubectl get svc -n ingress-nginx
NAME                                 TYPE           CLUSTER-IP      EXTERNAL-IP     PORT(S)                      AGE
ingress-nginx-controller             LoadBalancer   10.233.32.222   192.168.88.20   80:32653/TCP,443:31755/TCP   94m
ingress-nginx-controller-admission   ClusterIP      10.233.26.11    <none>          443/TCP                      94m
With the networking configured, the Kubernetes cluster is now ready to use. At this stage persistent volumes are not supported as there is no CSI driver installed. We will cover in our next post how to set up a storage solution for your Baremetal cluster.
Interested in a managed cluster running on your premises? Feel free to reach out for consultation or check out our available plans.